
I wanted to try something new and decided to take up baking. I have an admission to make: I can’t cook; I am clueless in the kitchen outside of prepared foods, so I worked with my sister, who loves baking. All of the cooking articles online show these amazing photographs and have these crazy, lengthy postings before they ever get to a list of ingredients or explain how to make it. It’s like they have a word quota to meet or something. I just wanted the recipe, and then I had the idea. Why not just ask an AI chatbot for a straight answer?
With the assistance of generative AI-produced recipes, we made chocolate chip cookies, double chocolate fudge cookies, and finally a purple velvet cake with cream cheese frosting. They tasted wonderful, the visuals varied, and no one died from food poisoning, although we may have fallen victim to a sugar coma. We decided to call our collection AI-slop Baking, and I figured I have a platform; why not share what I learned?
Chocolate Chip Cookies


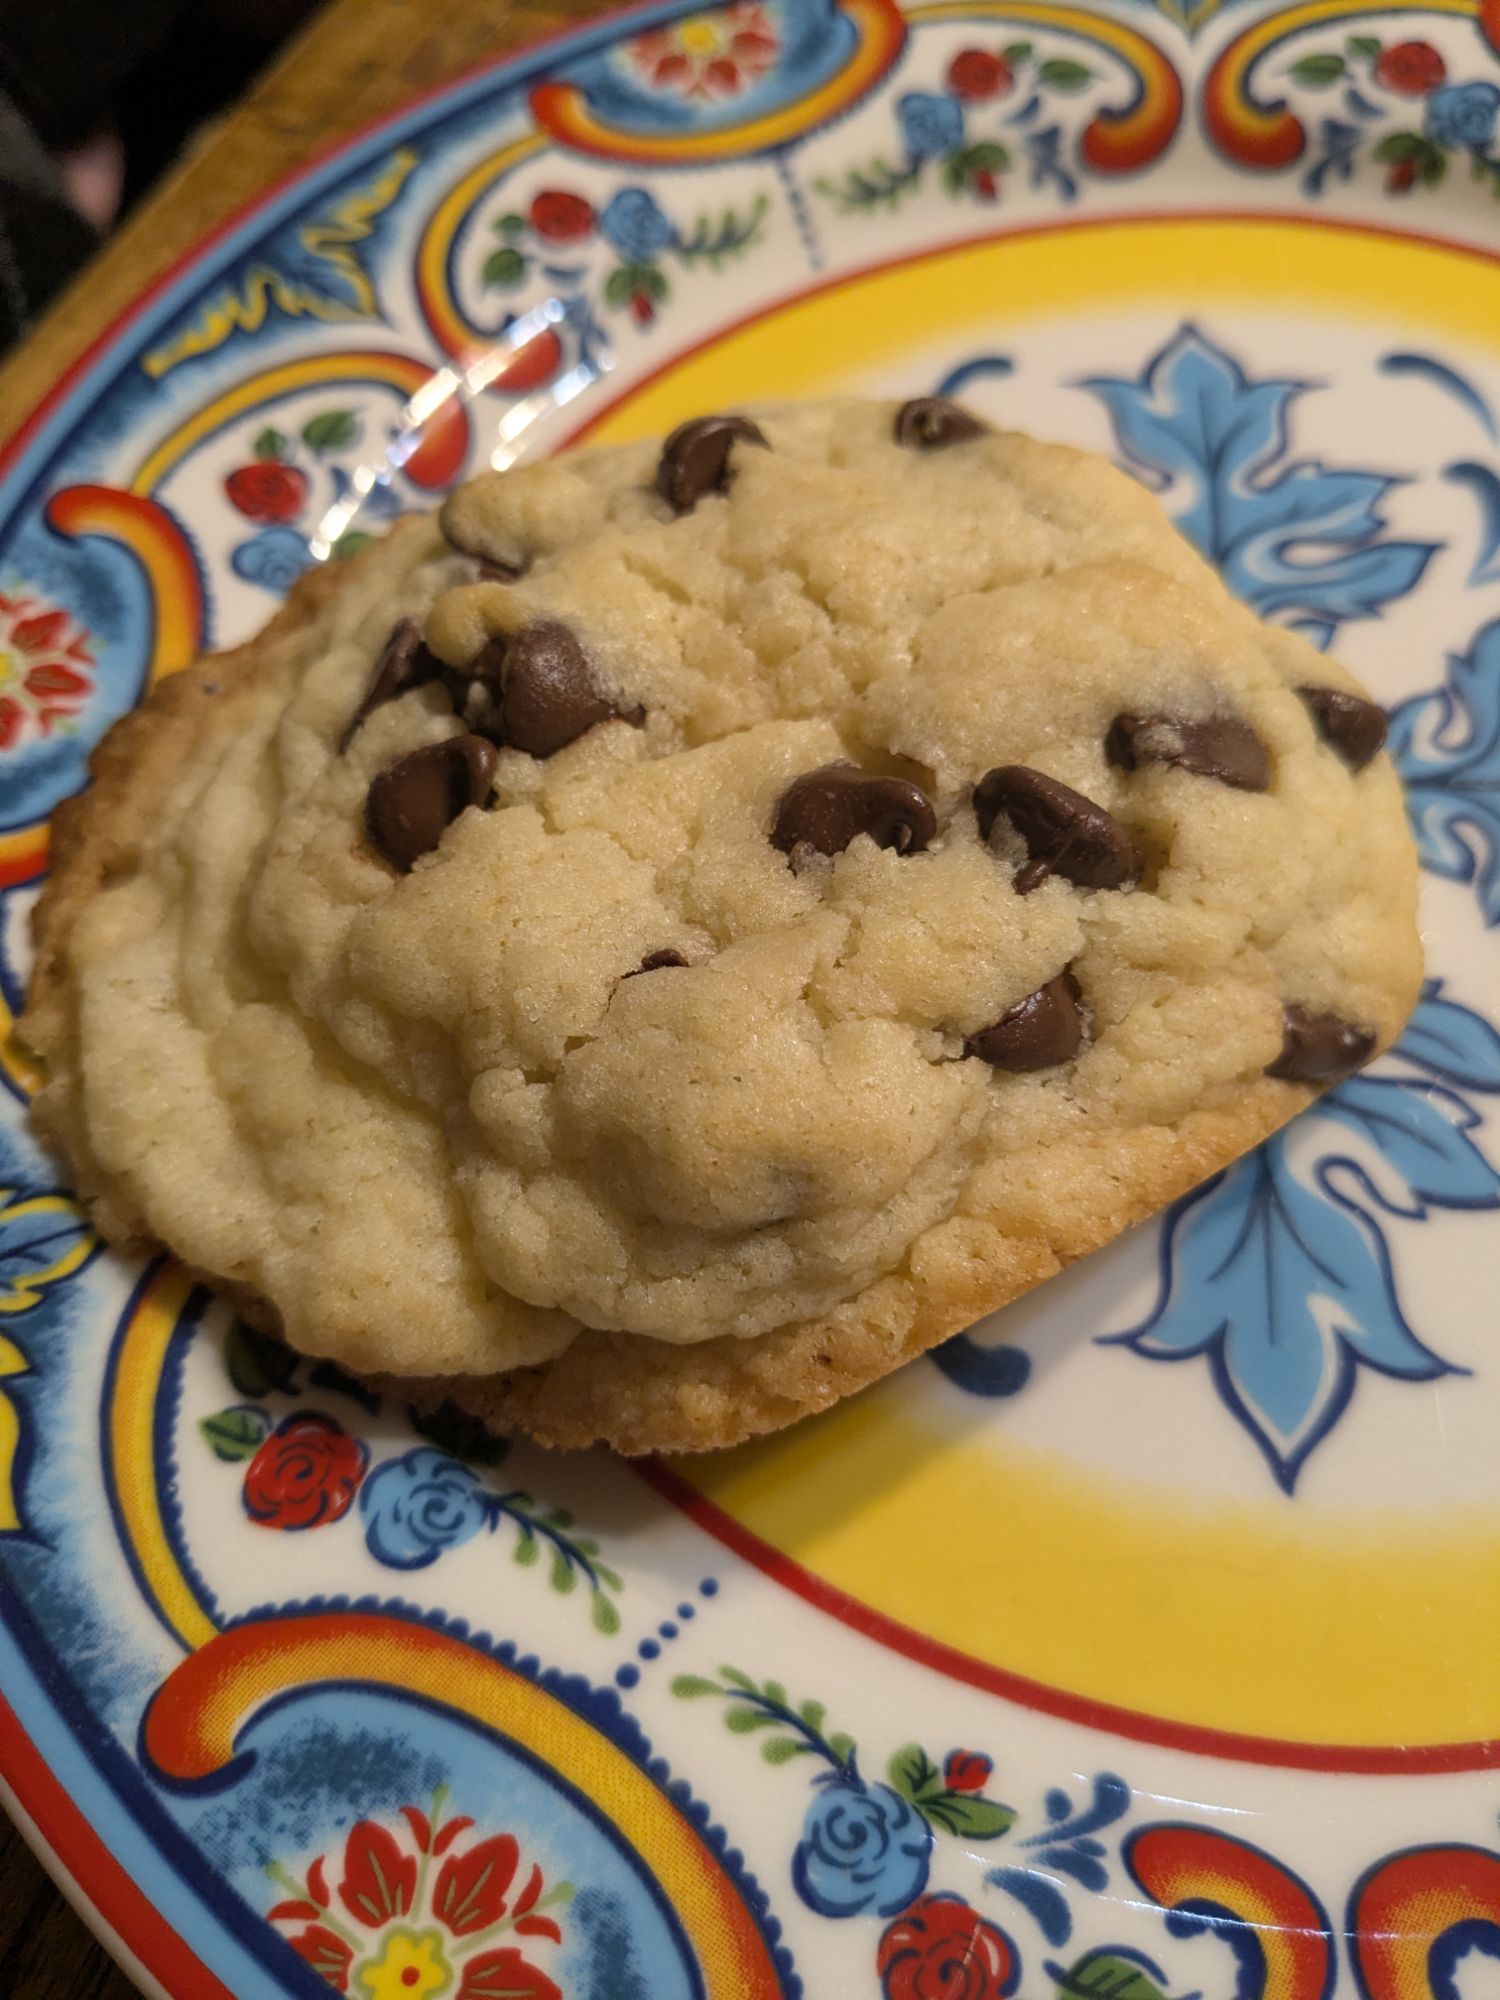
These were our first attempt at using AI for baking. The available ingredients were somewhat constrained, but the results still turned out great. The one thing I learned about cooking from books is that you can always use a substitute ingredient with similar properties when necessary. We used the Google Gemini 3.1 Pro model with extended thinking to create the recipe. The model chose to create chocolate chip cookies. This was helpful because it kept things simple while we were learning to work together and use AI tools.
Ingredients
- Butter: 2 sticks (1 cup), softened to room temperature
- Granulated sugar: 1 cup
- Eggs: 2 large eggs
- All-purpose flour: 2 and 1/4 cups
- Baking soda: 1/2 teaspoon
- Baking powder: 1/2 teaspoon
- Chocolate chips: 1 and 1/2 to 2 cups
How To Bake
1. Preheat the oven: Set your oven to 375°F. Line a baking sheet with parchment paper, or leave it ungreased.
2. Cream butter and sugar: In a large bowl, beat the 2 sticks of softened butter and 1 cup of granulated sugar together with a mixer or wooden spoon until the mixture becomes smooth and light in texture (about 3 minutes).
3. Add the eggs: Add the eggs one at a time, mixing well after each addition until fully incorporated.
4. Mix in dry ingredients: Sprinkle the 1/2 teaspoon of baking soda and 1/2 teaspoon of baking powder over the bowl, then stir in the 2 and 1/4 cups of flour. Stir just until the flour disappears into a uniform dough. Try not to overmix here so the cookies stay tender.
5. Fold in chocolate chips: Stir in your chocolate chips using a sturdy spoon or spatula until they are distributed evenly throughout the dough.
6. Scoop and bake: Drop rounded tablespoons of dough onto your baking sheet, keeping about 2 inches of space between each to allow room for spreading. Bake at 375°F for 9 to 11 minutes. They are ready when the edges are lightly golden and the centers look set.
7. Cool: Let the cookies sit on the hot baking sheet for 5 minutes after taking them out of the oven so they can firm up before moving them to a rack or plate.
Notes
We didn’t actually measure the chocolate chips, so the flavor we ended up with may have differed slightly from the recipe.
Double Chocolate Fudge Cookies


These were a blast, turned out great, and I forgot to take photographs. We use Claude Opus 5 on the default thinking configuration. However, Claude did this cool thing with the cooking instructions with built-in timers, which we found useful.
Ingredients
- 1/2 cup butter, softened
- 1 cup granulated cane sugar
- 1 large egg
- 1 cup all-purpose flour
- 1/3 cup unsweetened cocoa powder
- 1/2 tsp baking soda
- 1/4 tsp baking powder
- 1 cup chocolate chips
How To Bake
- Set the oven to 350°F and position a rack in the center. Grease two baking sheets lightly with a little butter, or line them with parchment if you have it.
- Beat 1/2 cup softened butter and 1 cup granulated cane sugar together until the mixture feels lighter and fluffier and no longer grainy under the spoon or beater. A hand mixer makes the process much faster.
- Beat in 1 large egg until the mixture looks smooth and holds together in one glossy mass.
- In a separate bowl, stir together 1 cup all-purpose flour, 1/3 cup unsweetened cocoa powder, 1/2 tsp baking soda, and 1/4 tsp baking powder until evenly combined with no cocoa lumps.
- Add the dry mixture to the butter mixture and stir just until no dry flour remains. The dough will be thick and stiff. Fold in 1 cup chocolate chips.
- Cover the bowl and refrigerate. This step matters more than usual here, because all-white-sugar dough spreads fast when warm.
- Roll heaping tablespoons of dough into balls and place them on the sheets, about two inches apart. Nine per sheet, in three rows of three, keeps the spacing easy to track by touch.
- Bake until the edges are set and the centers still feel soft when gently pressed. They will look underdone in the middle, and that is exactly right.
- Let the cookies sit on the hot sheet before moving them. They finish setting during this time and will fall apart if you rush them.
Notes
If you have salt anywhere in the kitchen, add half a teaspoon with the dry ingredients. It’s the single biggest flavor upgrade you can make here. Variation: skip the cocoa, use one and a quarter cups of flour total, and stir food dye into the wet mixture for brightly colored sugar cookies with chips. Or keep the cocoa and add red dye at the egg stage, and you have red velvet cookies.
Purple Velvet Chocolate Cake with Cream Cheese Frosting


The next step is where things got ambitious; we baked a stacked cake from scratch. We wanted the best instructions possible, so we used Claude Opus 5 again but increased the thinking setting to max. We were initially unsure about pan sizes, and those numbers are important. To solve this problem, we took a photo of the pans alongside a standard plastic water bottle and asked Claude to use the water bottle and the pans for scaling, as well as the brand name printed on the pans. It made the assumption that the pan was likely two inches deep, which at a glance looked accurate. But I wasn’t about to go on a search for a ruler, so we chose to trust the estimates. We did make some mistakes in following the instructions exactly, which led to the lower cake splitting into two. It was visually imperfect, but it tasted good, even for someone who is not a huge fan of cream cheese.
Ingredients
Baking a cake requires considerably more ingredients than a batch or two of cookies, and we decided to use every resource we had.
In the cake batter
- All-purpose flour, 2 and 1/2 cups measured, then remove 5 tablespoons
- Cornstarch, 5 tablespoons, replacing the flour you removed
- Cocoa powder, 2 tablespoons
- Baking powder, 2 teaspoons
- Baking soda, 1/2 teaspoon
- Salt, 3/4 teaspoon, if you have it
- Cane sugar, 1 and 1/4 cups
- Brown sugar, 1/2 cup packed
- Vegetable oil, 1/2 cup
- Butter, 1/2 cup plus 1 tablespoon, melted and cooled
- Large eggs, 3, at room temperature
- Vanilla extract, 1 tablespoon
- Water, 1 cup, warm
- Red food dye, 120 drops, or about 1 and 1/4 teaspoons
- Blue food dye, 45 drops, or a scant 1/2 teaspoon
In the frosting
- Betty Crocker Rich and Creamy cream cheese frosting, 1 can
- Butter, 1/2 cup, softened
- Salt, a pinch, optional
For the pans
- Butter, softened, for greasing
- Flour, for dusting
Optional, only if you happen to have it
- White vinegar or lemon juice, 1 teaspoon, for a little of that classic red velvet tang
Total butter needed
About 1 and 1/4 cups, which is 2 and 1/2 sticks. That is a half cup plus a tablespoon for the batter, a half cup for the frosting, and a bit for the pans. It’s worth checking you have enough before you start.
how to bake
Dry
- All-purpose flour, 2 and 1/2 cups measured, then remove 5 tablespoons
- Cornstarch, 5 tablespoons, replacing the flour you removed
- Cocoa powder, 2 tablespoons
- Baking powder, 2 teaspoons
- Baking soda, 1/2 teaspoon
- Salt, 3/4 teaspoon, if you have it
Wet
- Cane sugar, 1 and 1/4 cups
- Brown sugar, 1/2 cup packed
- Vegetable oil, 1/2 cup
- Butter, 1/2 cup plus 1 tablespoon, melted and cooled
- Large eggs, 3, at room temperature
- Vanilla extract, 1 tablespoon
- Water, 1 cup, warm
- Red food dye, 120 drops or about 1 and 1/4 teaspoons
- Blue food dye, 45 drops or a scant 1/2 teaspoon
- White vinegar or lemon juice, 1 teaspoon, optional
Frosting
- Betty Crocker cream cheese frosting, 1 can
- Butter, 1/2 cup, softened
- Salt, a pinch, optional
Pans
- Softened butter and a little flour
Instructions
- Heat the oven to 325 degrees Fahrenheit and set out your butter and eggs so they come to room temperature.
- Grease and flour both pans. Rub softened butter around with your fingers, paying attention to the walls and the corners where the walls meet the base. Add a spoonful of flour, tilt and rotate the pan to coat, then tap the excess out over the sink. Do this step before you start mixing so it does not get forgotten.
- Melt the butter for the batter and set it aside to cool until it feels barely warm.
- Whisk the flour, cornstarch, cocoa, baking powder, baking soda, and salt together in a large bowl for a full thirty seconds.
- In a second large bowl, whisk the oil, cooled melted butter, cane sugar, and brown sugar together. Beat in the eggs one at a time, then the vanilla, and then the vinegar, if using.
- Add the water and both food dyes. Whisk longer than feels necessary, since streaky dye means streaky cake.
- Add the dry to the wet in two additions, mixing just until you cannot feel any dry pockets against the side of the bowl. The batter will be loose, more like heavy cream than frosting. That is correct.
- Divide between the two pans. Split by weight on a scale if you want them even, or pour half by eye and check by lifting each pan and feeling its heft.
- Bake for 28 to 35 minutes; first check at 26. A done cake springs back when you press the center, goes quiet instead of faintly crackling when you hold it near your ear, and has pulled back slightly from the pan’s walls. A skewer comes out dry with maybe a crumb or two.
- Cool in the pans for exactly 15 minutes. Set a timer. This window matters more than usual with nonstick.
- Loosen the edge with a silicone spatula or plastic knife pressed against the pan wall. Never metal, since it will ruin the ceramic coating. Turn out onto a rack in one decisive flip, rap the pan bottom with your palm, and lift straight up.
- Cool on the counter 20 to 30 minutes, uncovered, until the underside center feels barely warm rather than hot.
- Chill, loosely covered, for 45 to 60 minutes in the fridge, or wrap snugly in plastic and freeze for 30 to 40 minutes.
- Make the frosting. Beat the softened butter alone for 90 seconds until light and fluffy. Add the canned frosting in three additions, beating briefly after each. Then beat for 2 to 3 more minutes until it visibly grows. Add the pinch of salt.
- Assemble. First layer down, about a third of the frosting spread on top, and the second layer stacked upside down so its flat pan bottom becomes your level top. Frost the top, then the sides.
- Let it rest at room temperature for 30 to 45 minutes before serving.
Notes
On the pans
- If you catch an ungreased pan before it goes in the oven, pour the batter back into the bowl, wash and dry the pan, grease it properly, and pour it back. No harm done.
- If it is already baking, do not open the oven. Ceramic nonstick releases unoiled cakes far more often than not.
- If a cake sticks after baking, warm the pan on a burner over low heat for 60 to 90 seconds, moving it in slow circles, then flip immediately.
- Still stuck? Put the whole pan in the freezer for 25 to 30 minutes so the cake contracts away from the walls, then flip. High success rate.
- Tap the pan bottom before flipping. A baked cake sounds hollow and resonant. A spot still gripping sounds duller. That tells you where to work the spatula.
On the color
- Cocoa is brown, and brown dulls purple. Cut the cocoa to 1 tablespoon if you want a brighter, truer color and can live with less chocolate flavor.
- Butter is yellow, which is the direct opposite of purple, which is why the blue got bumped from 40 drops to 45.
- Add 10 more drops of blue for a cooler royal purple, or drop to 35 for a berry tone.
- Using gel instead of liquid? Use about 3/4 teaspoon red gel and 1/4 teaspoon blue gel.
On the ingredients
- The cornstarch swap is a homemade cake flour substitute. It is what makes the crumb velvety instead of sturdy.
- The full tablespoon of vanilla is doing flavor work that buttermilk would normally do. It is not a typo.
- The extra tablespoon of butter is because butter is only about 80 percent fat, so a straight one-to-one swap for oil slightly underfats the batter.
- Melted butter must be cooled before it meets the eggs, or you will scramble them.
- Softened butter for the frosting should dent under a fingertip and hold the dent but still feel cool and firm. Never melt the butter, since melted butter will not whip.
- Total butter needed is about 2 and 1/2 sticks. It’s worth confirming this before you start.
- If you want an all-oil cake instead, use 1 cup oil and no butter in the batter. It stays moister on day two but tastes less rich.
On the frosting
- Whipping butter into the can takes you from roughly 1 and 1/2 cups to about 2 and 1/2, which is what makes one can enough to fully cover a two-layer cake.
- If it feels too soft to hold its shape, chill the bowl for 15 minutes and rebeat.
- A cold cake makes buttered frosting stiffen faster. If it starts dragging, let it sit out for five minutes and re-fluff with the mixer.
- Blot any condensation off a chilled layer with a paper towel before frosting.
If something goes wrong
- A torn piece can be set back in place, pressed gently, and frosted over. Put any damaged layer on the bottom so the seam hides inside.
- If a layer comes out in real pieces, break both layers into chunks, layer them in a bowl with the whipped frosting, and call it a purple velvet trifle. Nobody needs to know.
Storage
- Keeps for 3 days at room temperature under a cover or 5 in the fridge.
- Always pull it out 30 to 45 minutes before serving. Cold butter tastes flat and waxy, and warming it back up genuinely transforms the thing.
Can AI slop baking replace traditional processes
So, can AI slop baking replace traditional recipe articles? Not exactly. It did something I found more useful.
The obvious win is the one I went in expecting. I asked for a recipe and got a recipe, with no preamble about someone’s grandmother’s kitchen. But the part I did not expect showed up in the details.
I keep custom instructions on every AI app I use asking for responses that work for a blind reader and skip the visuals. I assumed that would mostly mean fewer descriptions of golden-brown edges. What I got instead were recipes rebuilt around senses I actually have. A cake is done when it springs back, when it goes quiet instead of faintly crackling as you hold it near your ear, and when it has pulled away from the pan wall. Cookies go nine to a sheet, three rows of three, because that spacing is easy to track by touch. Batter is mixed enough when you cannot feel any dry pockets against the side of the bowl. Layers get divided evenly by lifting each pan and feeling its heft.
A traditional recipe blog tells me to bake until golden brown and then shows me four photographs of it. That is not a recipe I can follow. That is a recipe I can be told about.
The other thing food blogs cannot do is work with what is actually in my kitchen. We were low on nearly everything. The chocolate chip cookies had no vanilla, no brown sugar, and no salt, and they turned out wonderful, though I will admit they came out crisper and snappier than the chewy cookie most people picture. The recipes are hedged in ways print never does. Salt, if you have it. Cornstarch is standing in for cake flour. A full tablespoon of vanilla does the flavor work that buttermilk would normally handle. Canned frosting whipped with butter to stretch one can across two layers. A published recipe assumes a stocked pantry and simply fails you when yours does not match, and your only options are to go shopping or start the search over. This recipe adapted itself.
So no, a chatbot did not replace the food blogs, and I am not going to pretend a language model taught me to bake. My sister did that. But it wrote instructions I could follow on my own, out of ingredients we already had, and that turned out to be a different thing than shorter.
Have you tried AI-slop baking? If it worked, or if it went spectacularly sideways, write about it. I would like to read the failures most of all.
You must be logged in to post a comment.